vod.ing / workflow

From a long stream to a folder of ready-to-edit clips.

Every step happens in your browser, on our servers. No multi-gigabyte download, no local render. Scroll through the five stages below to see the editor you get with a plan.

The vod.ing VoD library showing requested Twitch streams with thumbnails and durations
01 DOWNLOAD

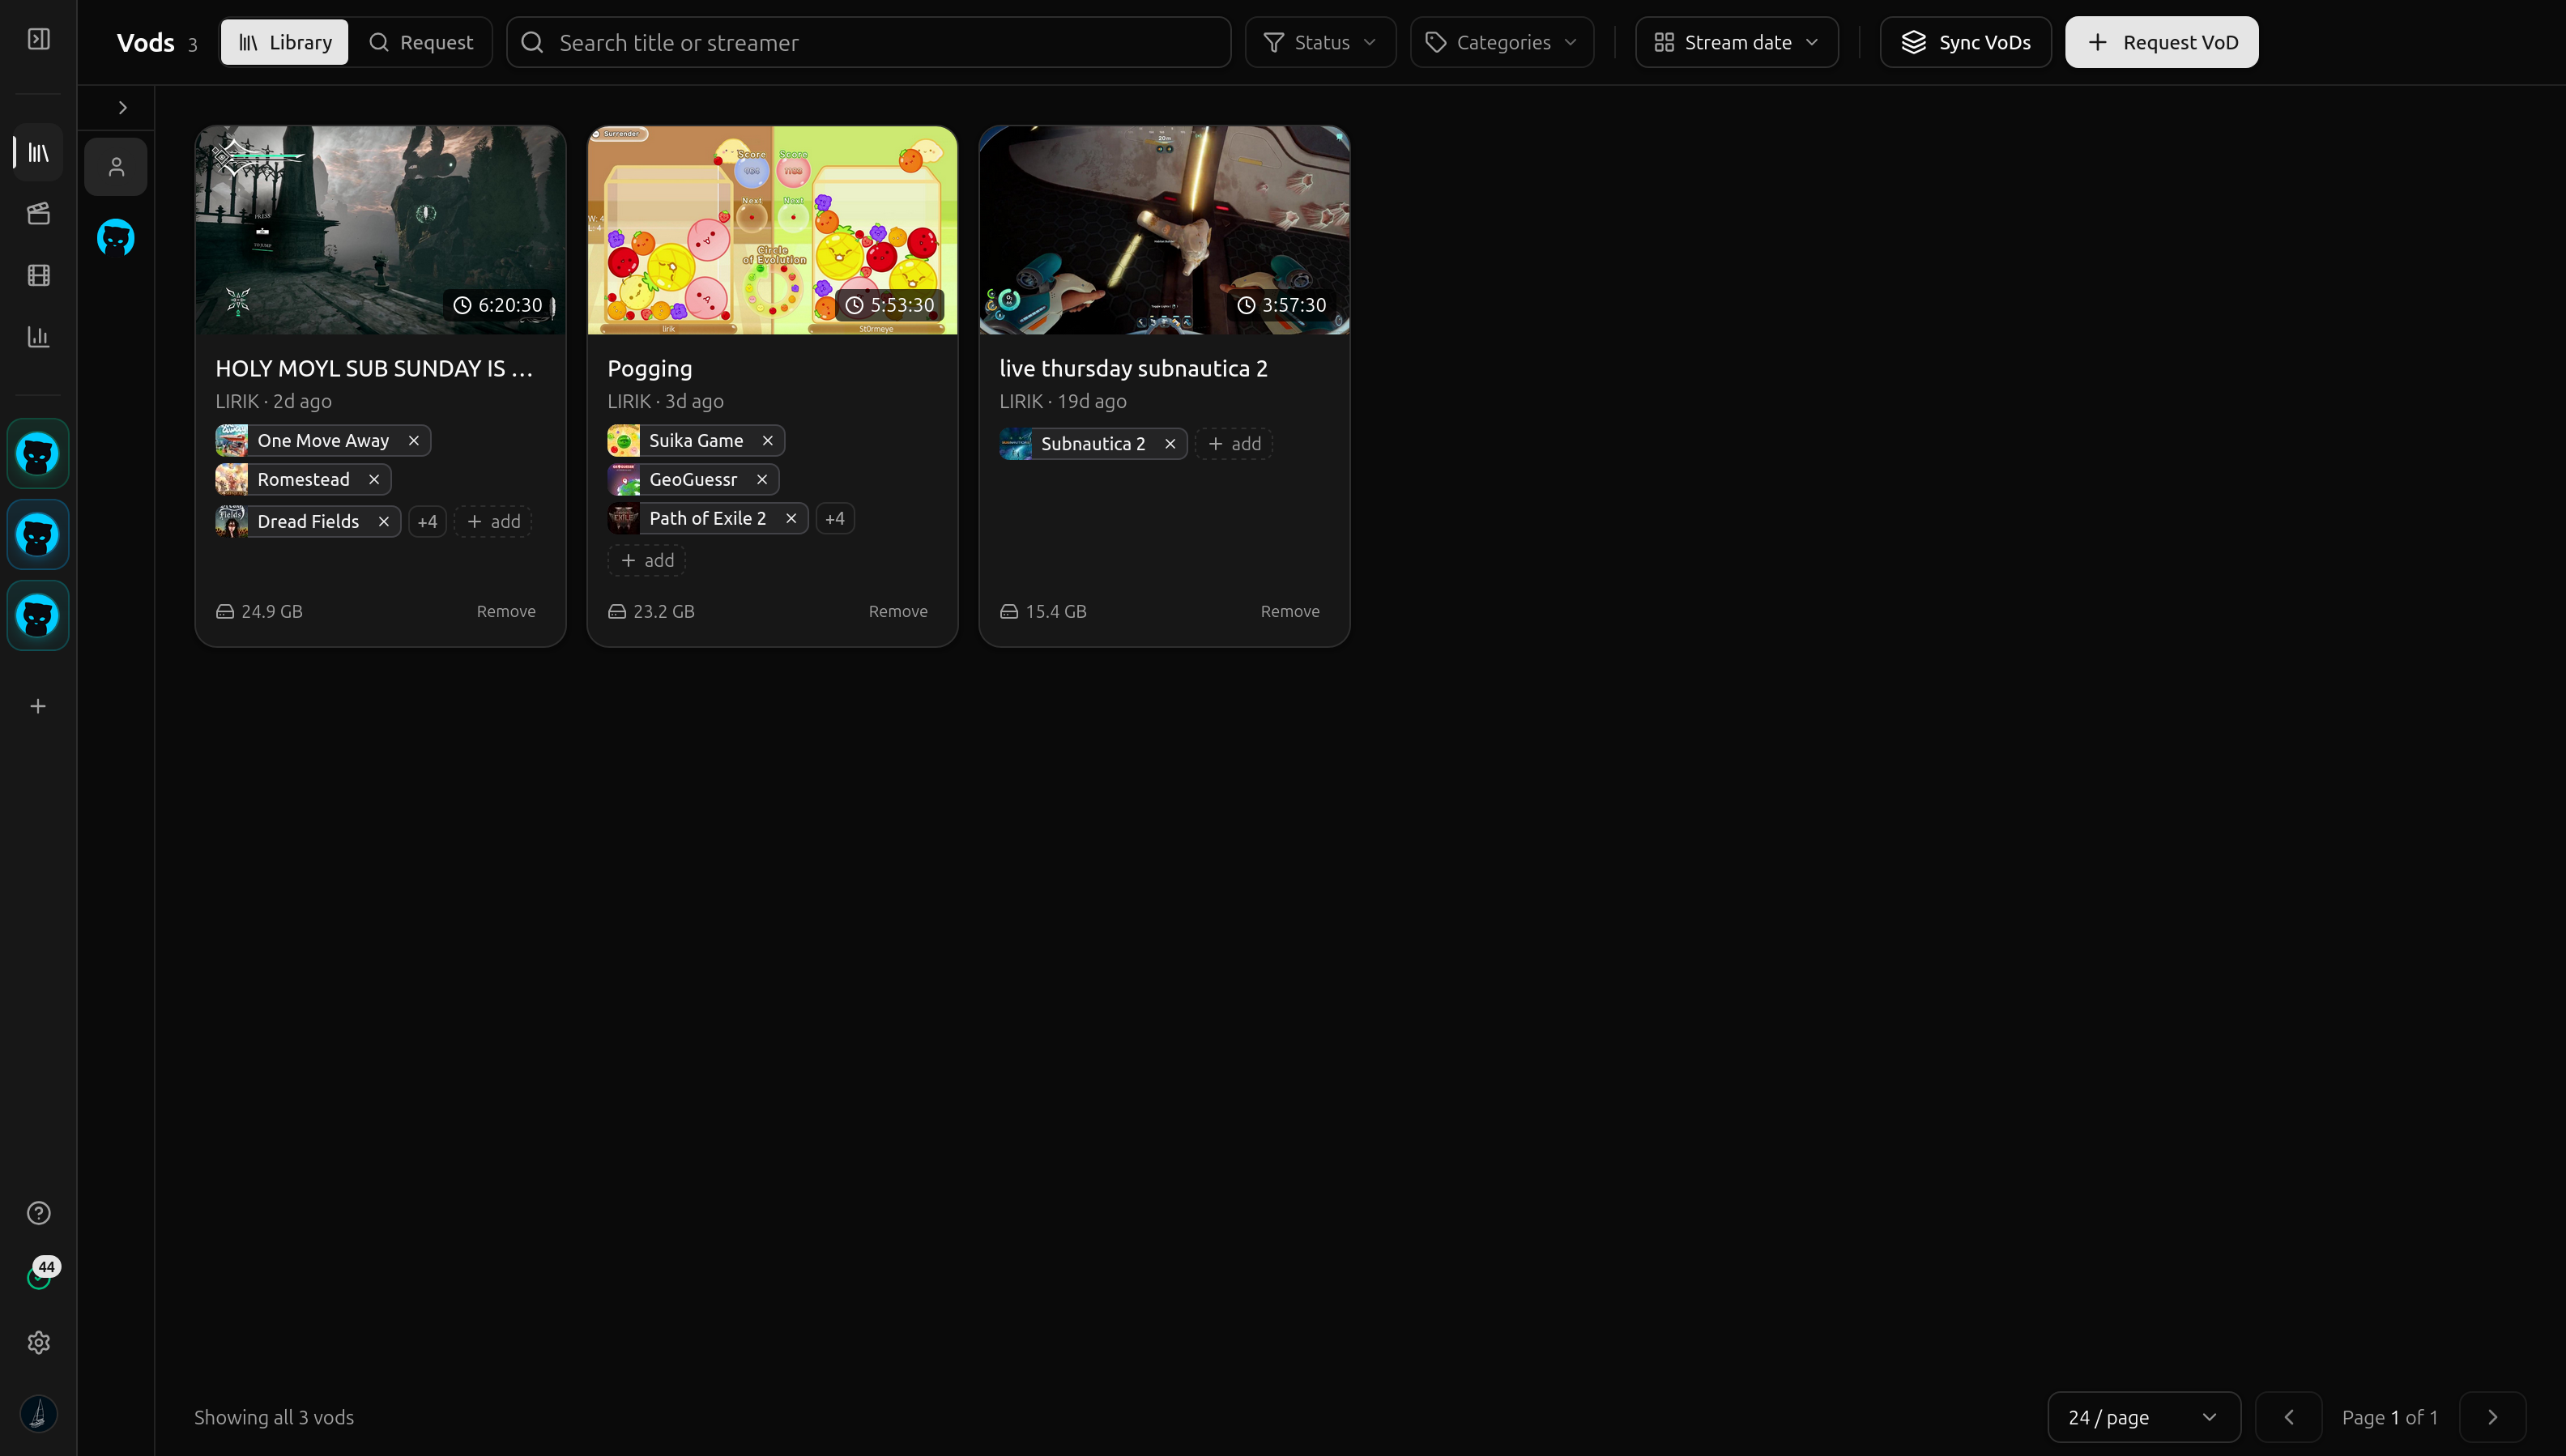
Pull in a VoD, no local download

Search for a streamer and pick a VoD from their archive. We fetch the video and full chat to our servers on a dedicated connection, so nothing touches your disk.

  1. The vod.ing VoD library showing requested Twitch streams with thumbnails and durations
  2. The vod.ing VoD library showing requested Twitch streams with thumbnails and durations
  3. The vod.ing VoD library showing requested Twitch streams with thumbnails and durations
The vod.ing editor with a chat-activity graph and bracketed clip regions below a video player
02 EDIT

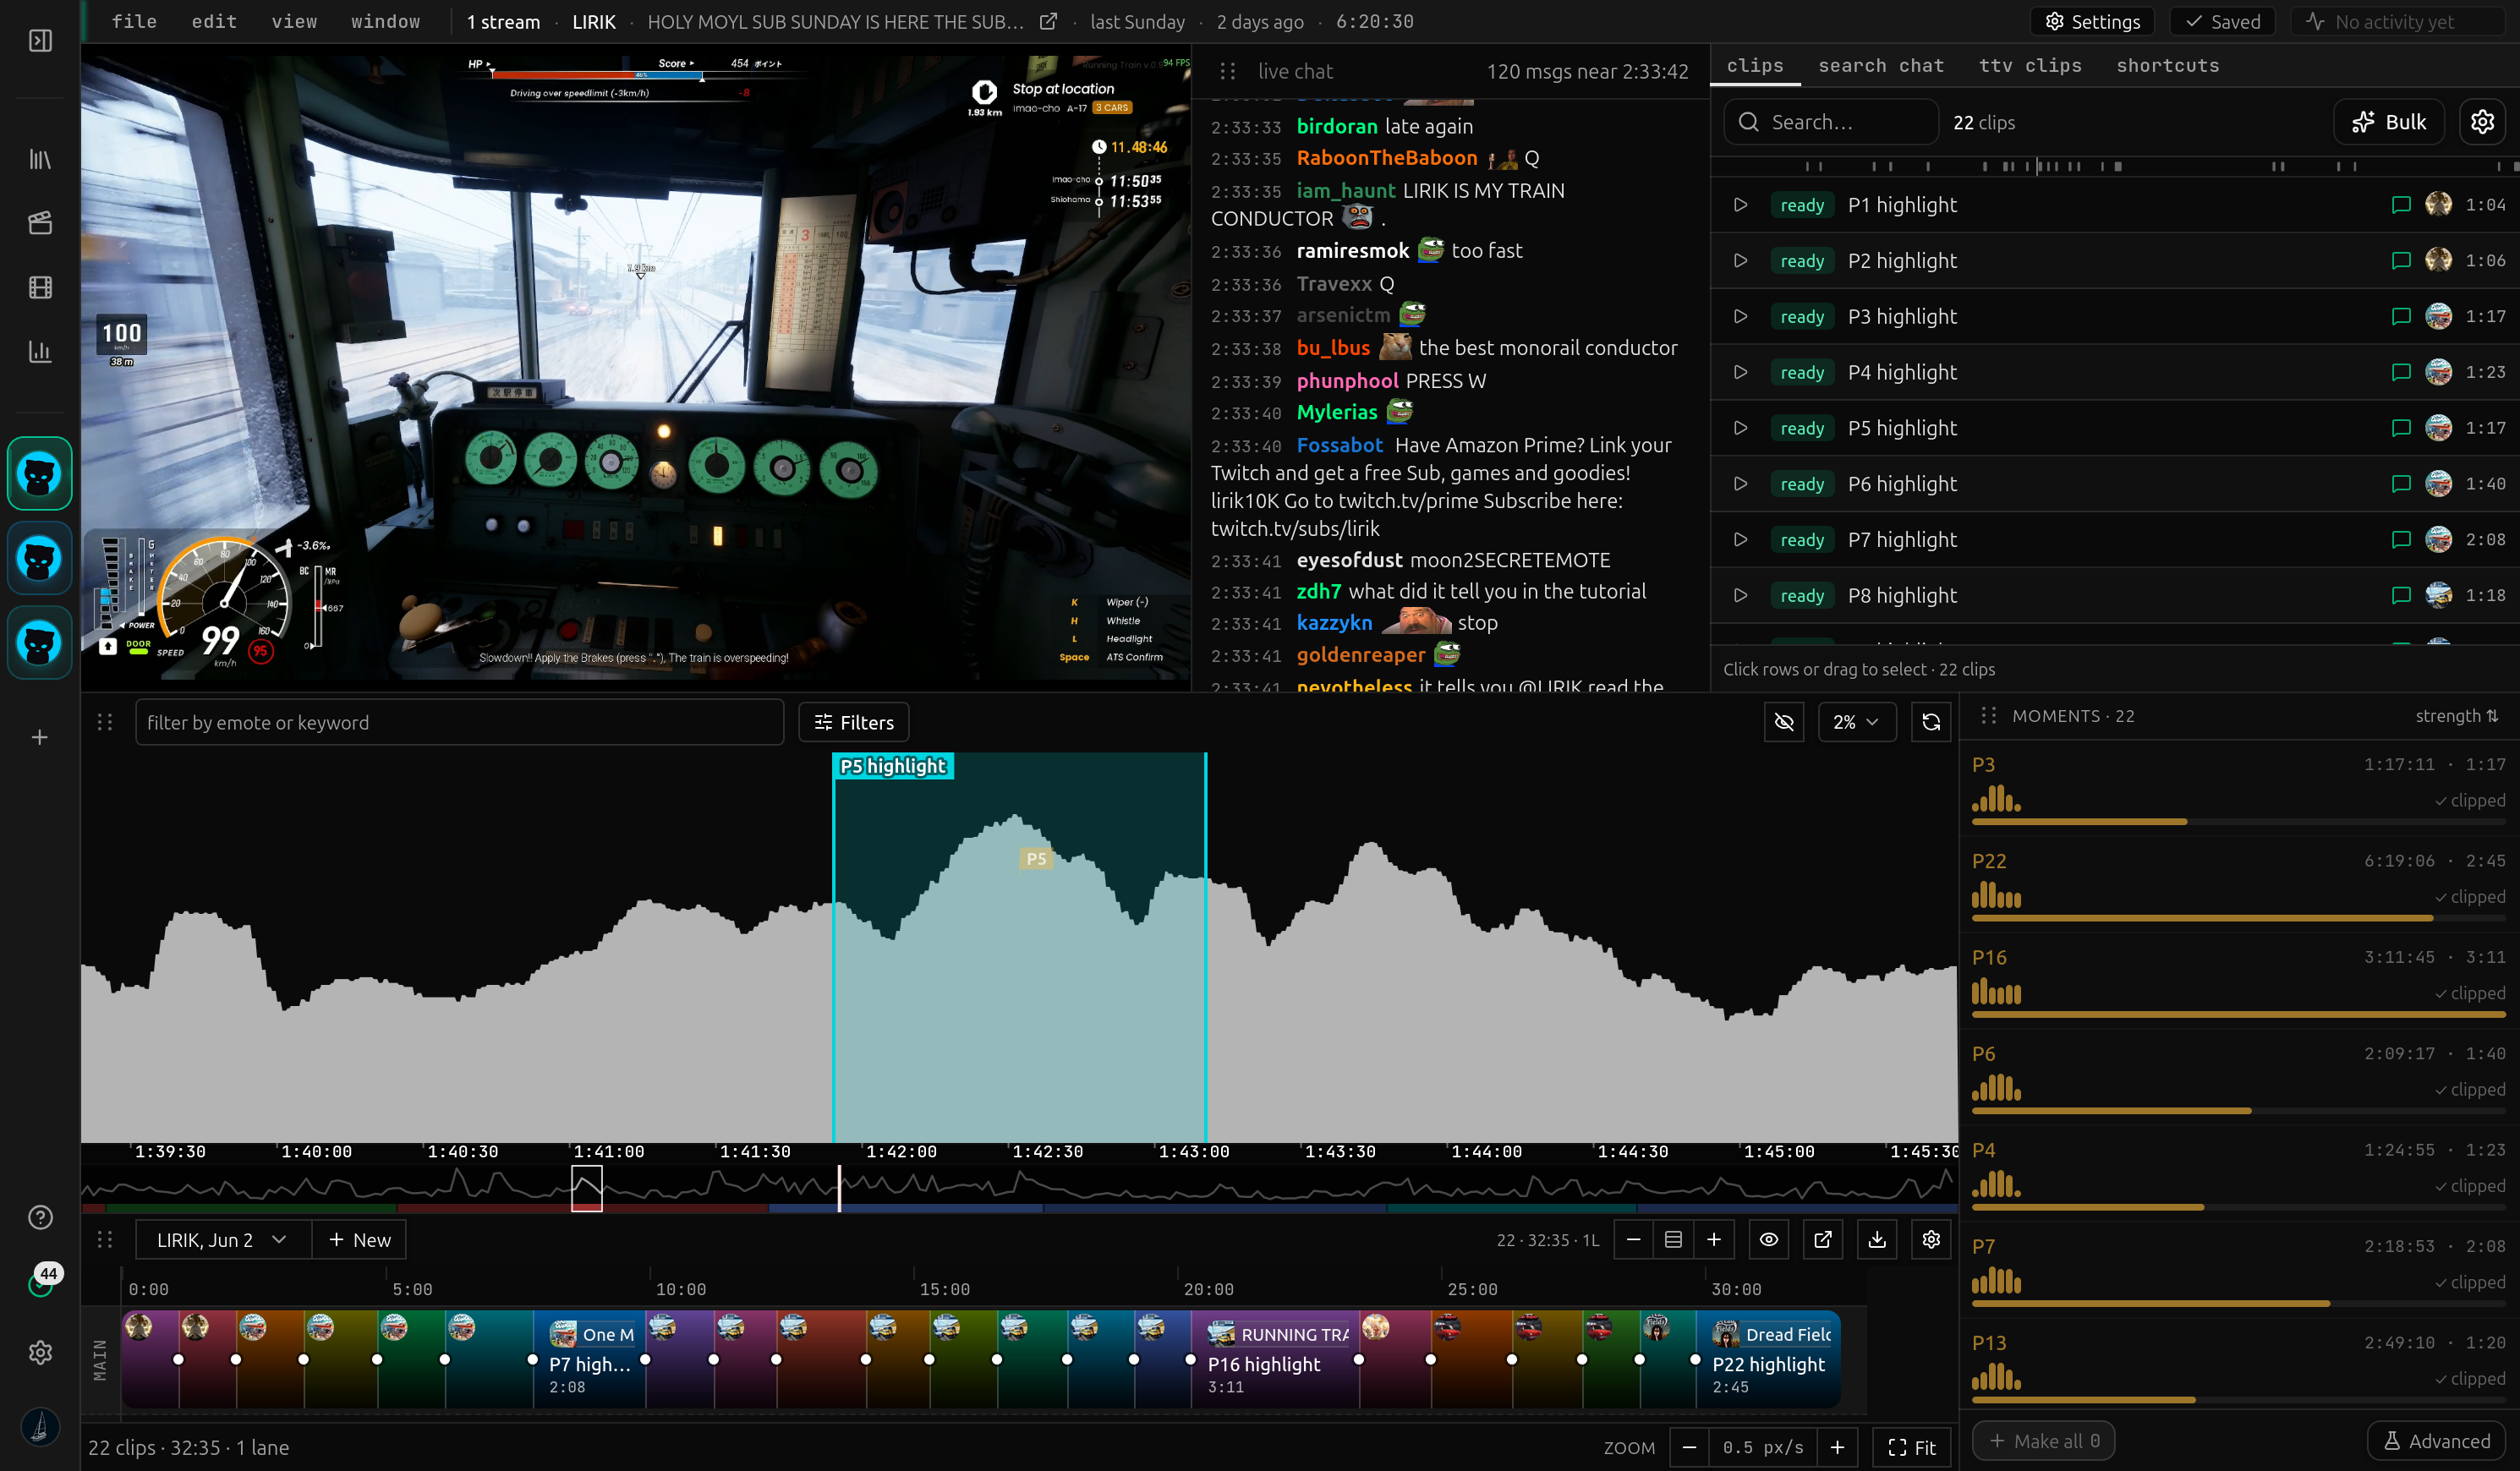
Find moments with the chat graph

The chat-activity graph turns hours of stream into a skimmable shape. Peaks usually mean something happened, so drag to bracket a clip in seconds.

  1. The vod.ing editor with a chat-activity graph and bracketed clip regions below a video player
  2. The vod.ing editor with a chat-activity graph and bracketed clip regions below a video player
  3. The vod.ing editor with a chat-activity graph and bracketed clip regions below a video player
The vod.ing clips manager showing a grid of clip cards with render states and thumbnails
03 CLIPS

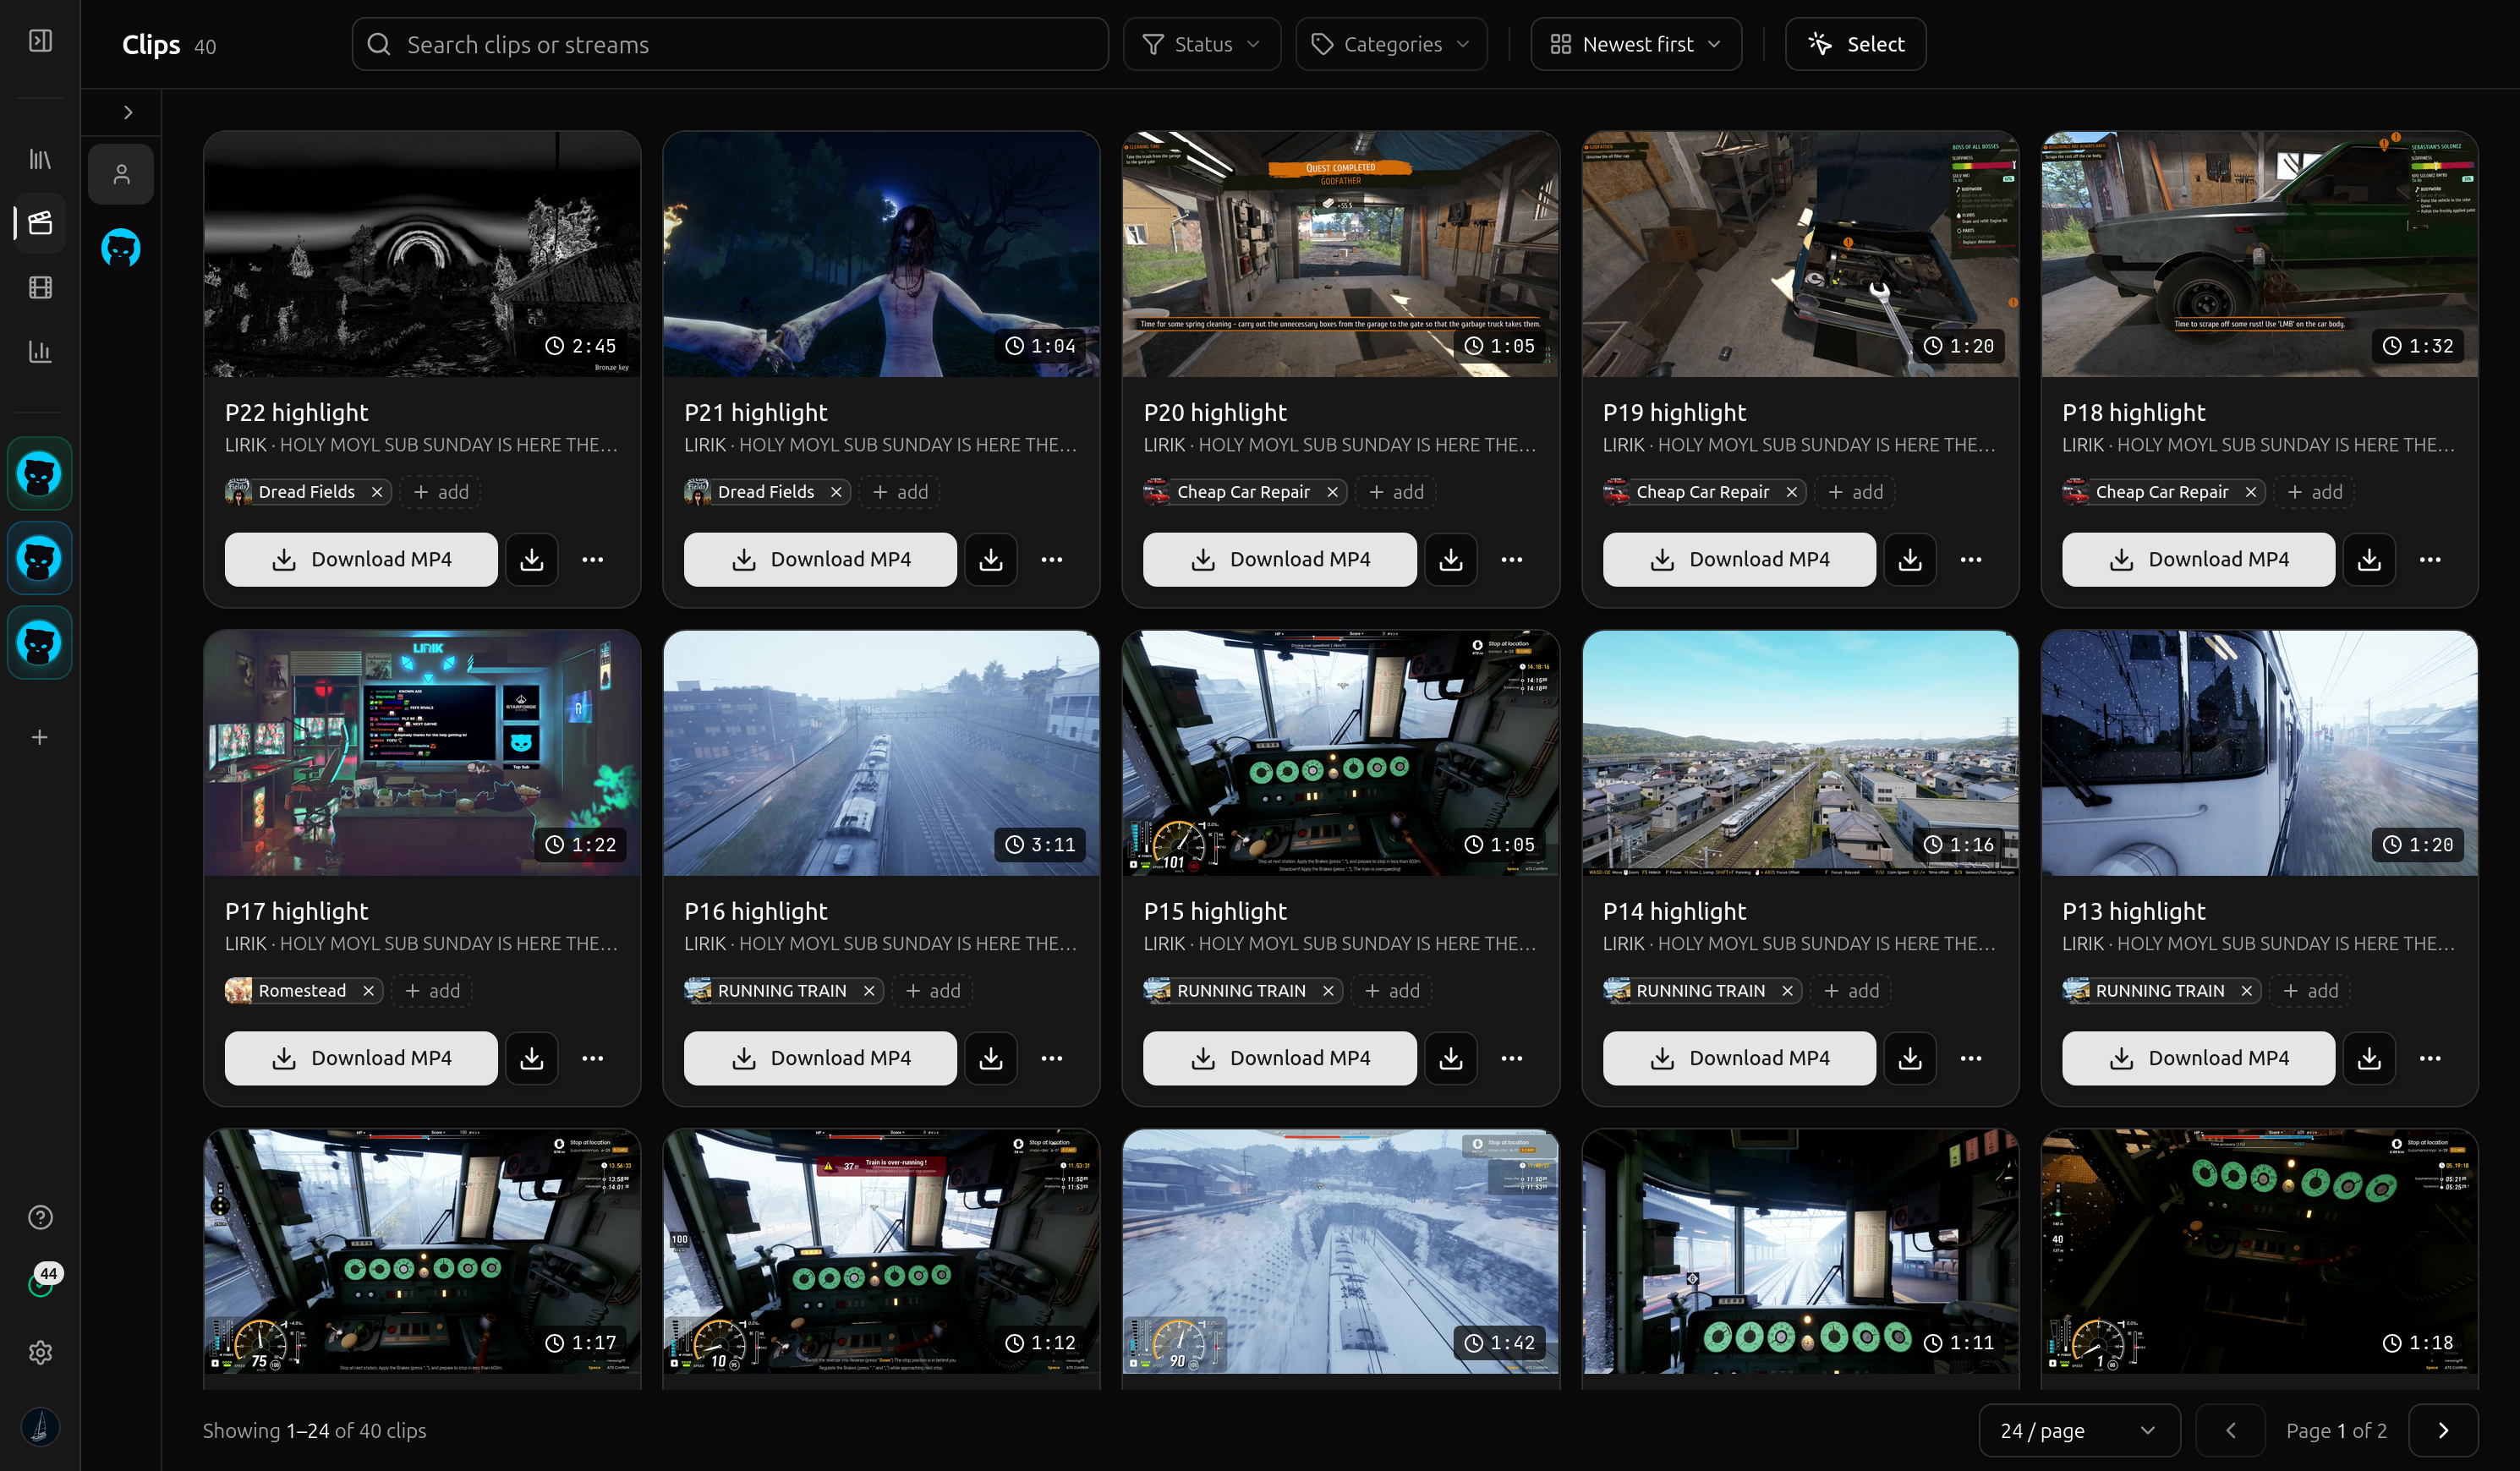
Manage and render your clips

Every clip you cut lands in one grid. Render an MP4 or a chat-overlay video on our servers, with no exporting from a local editor first.
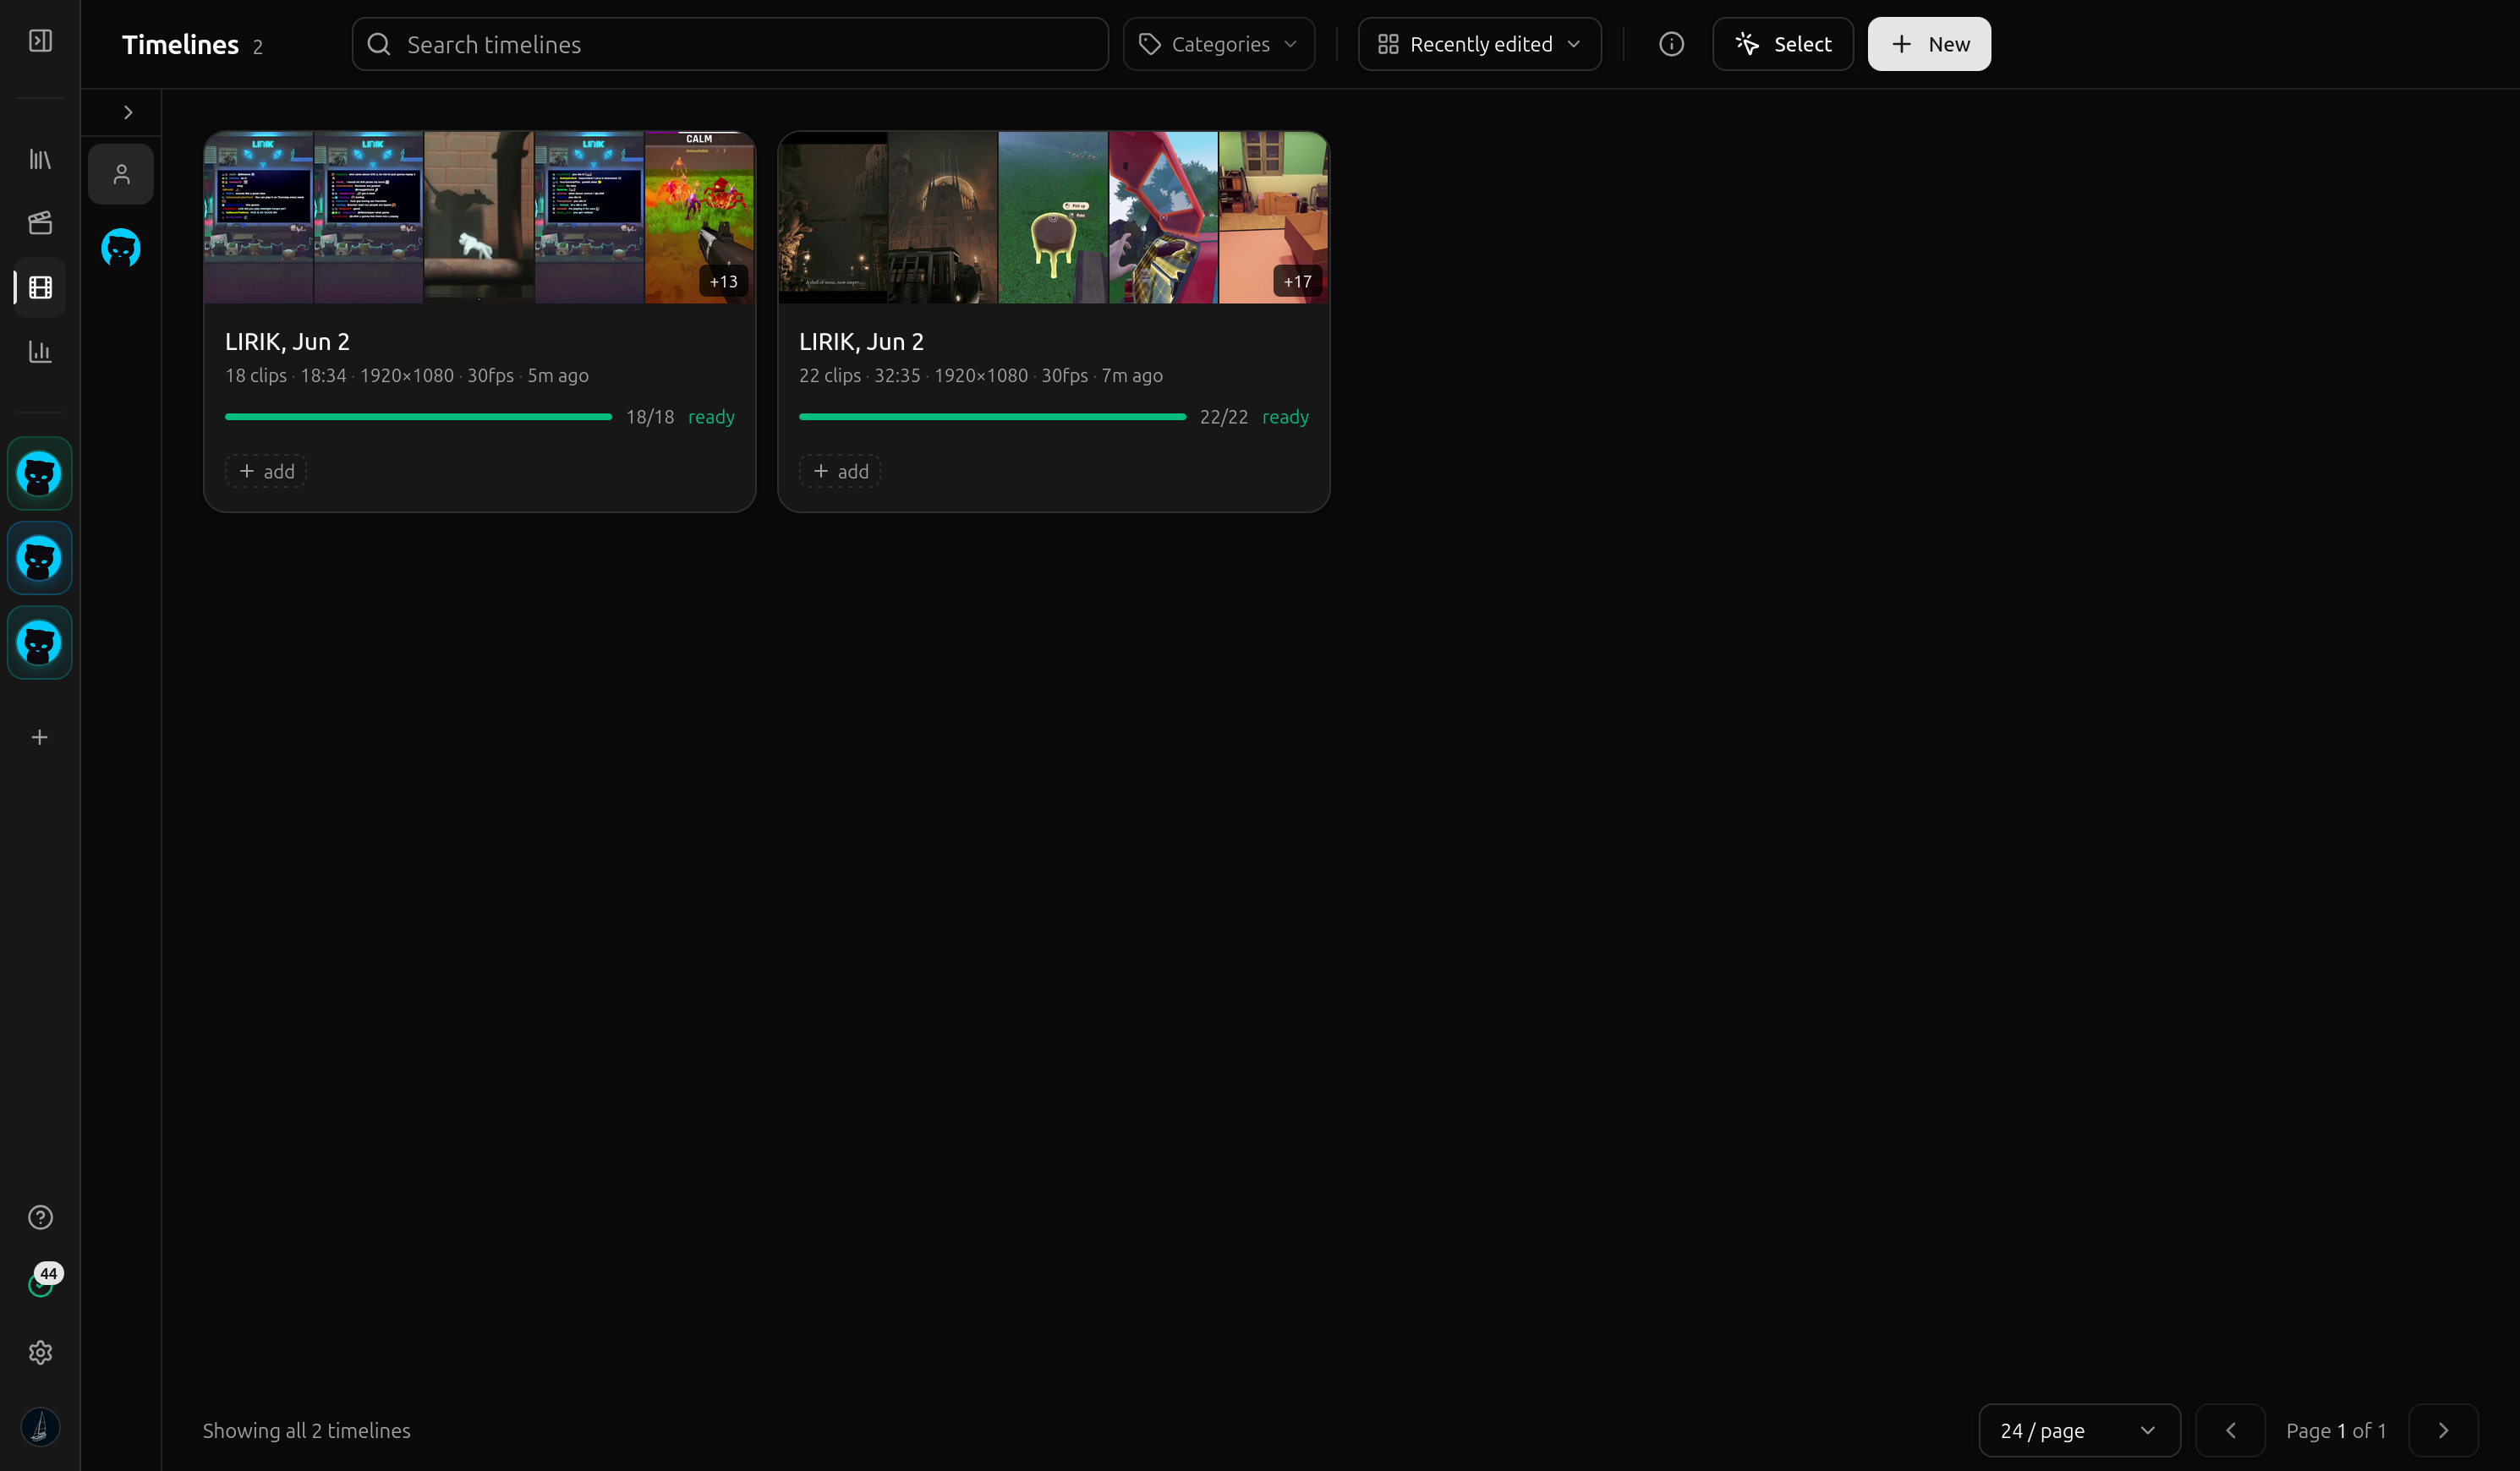
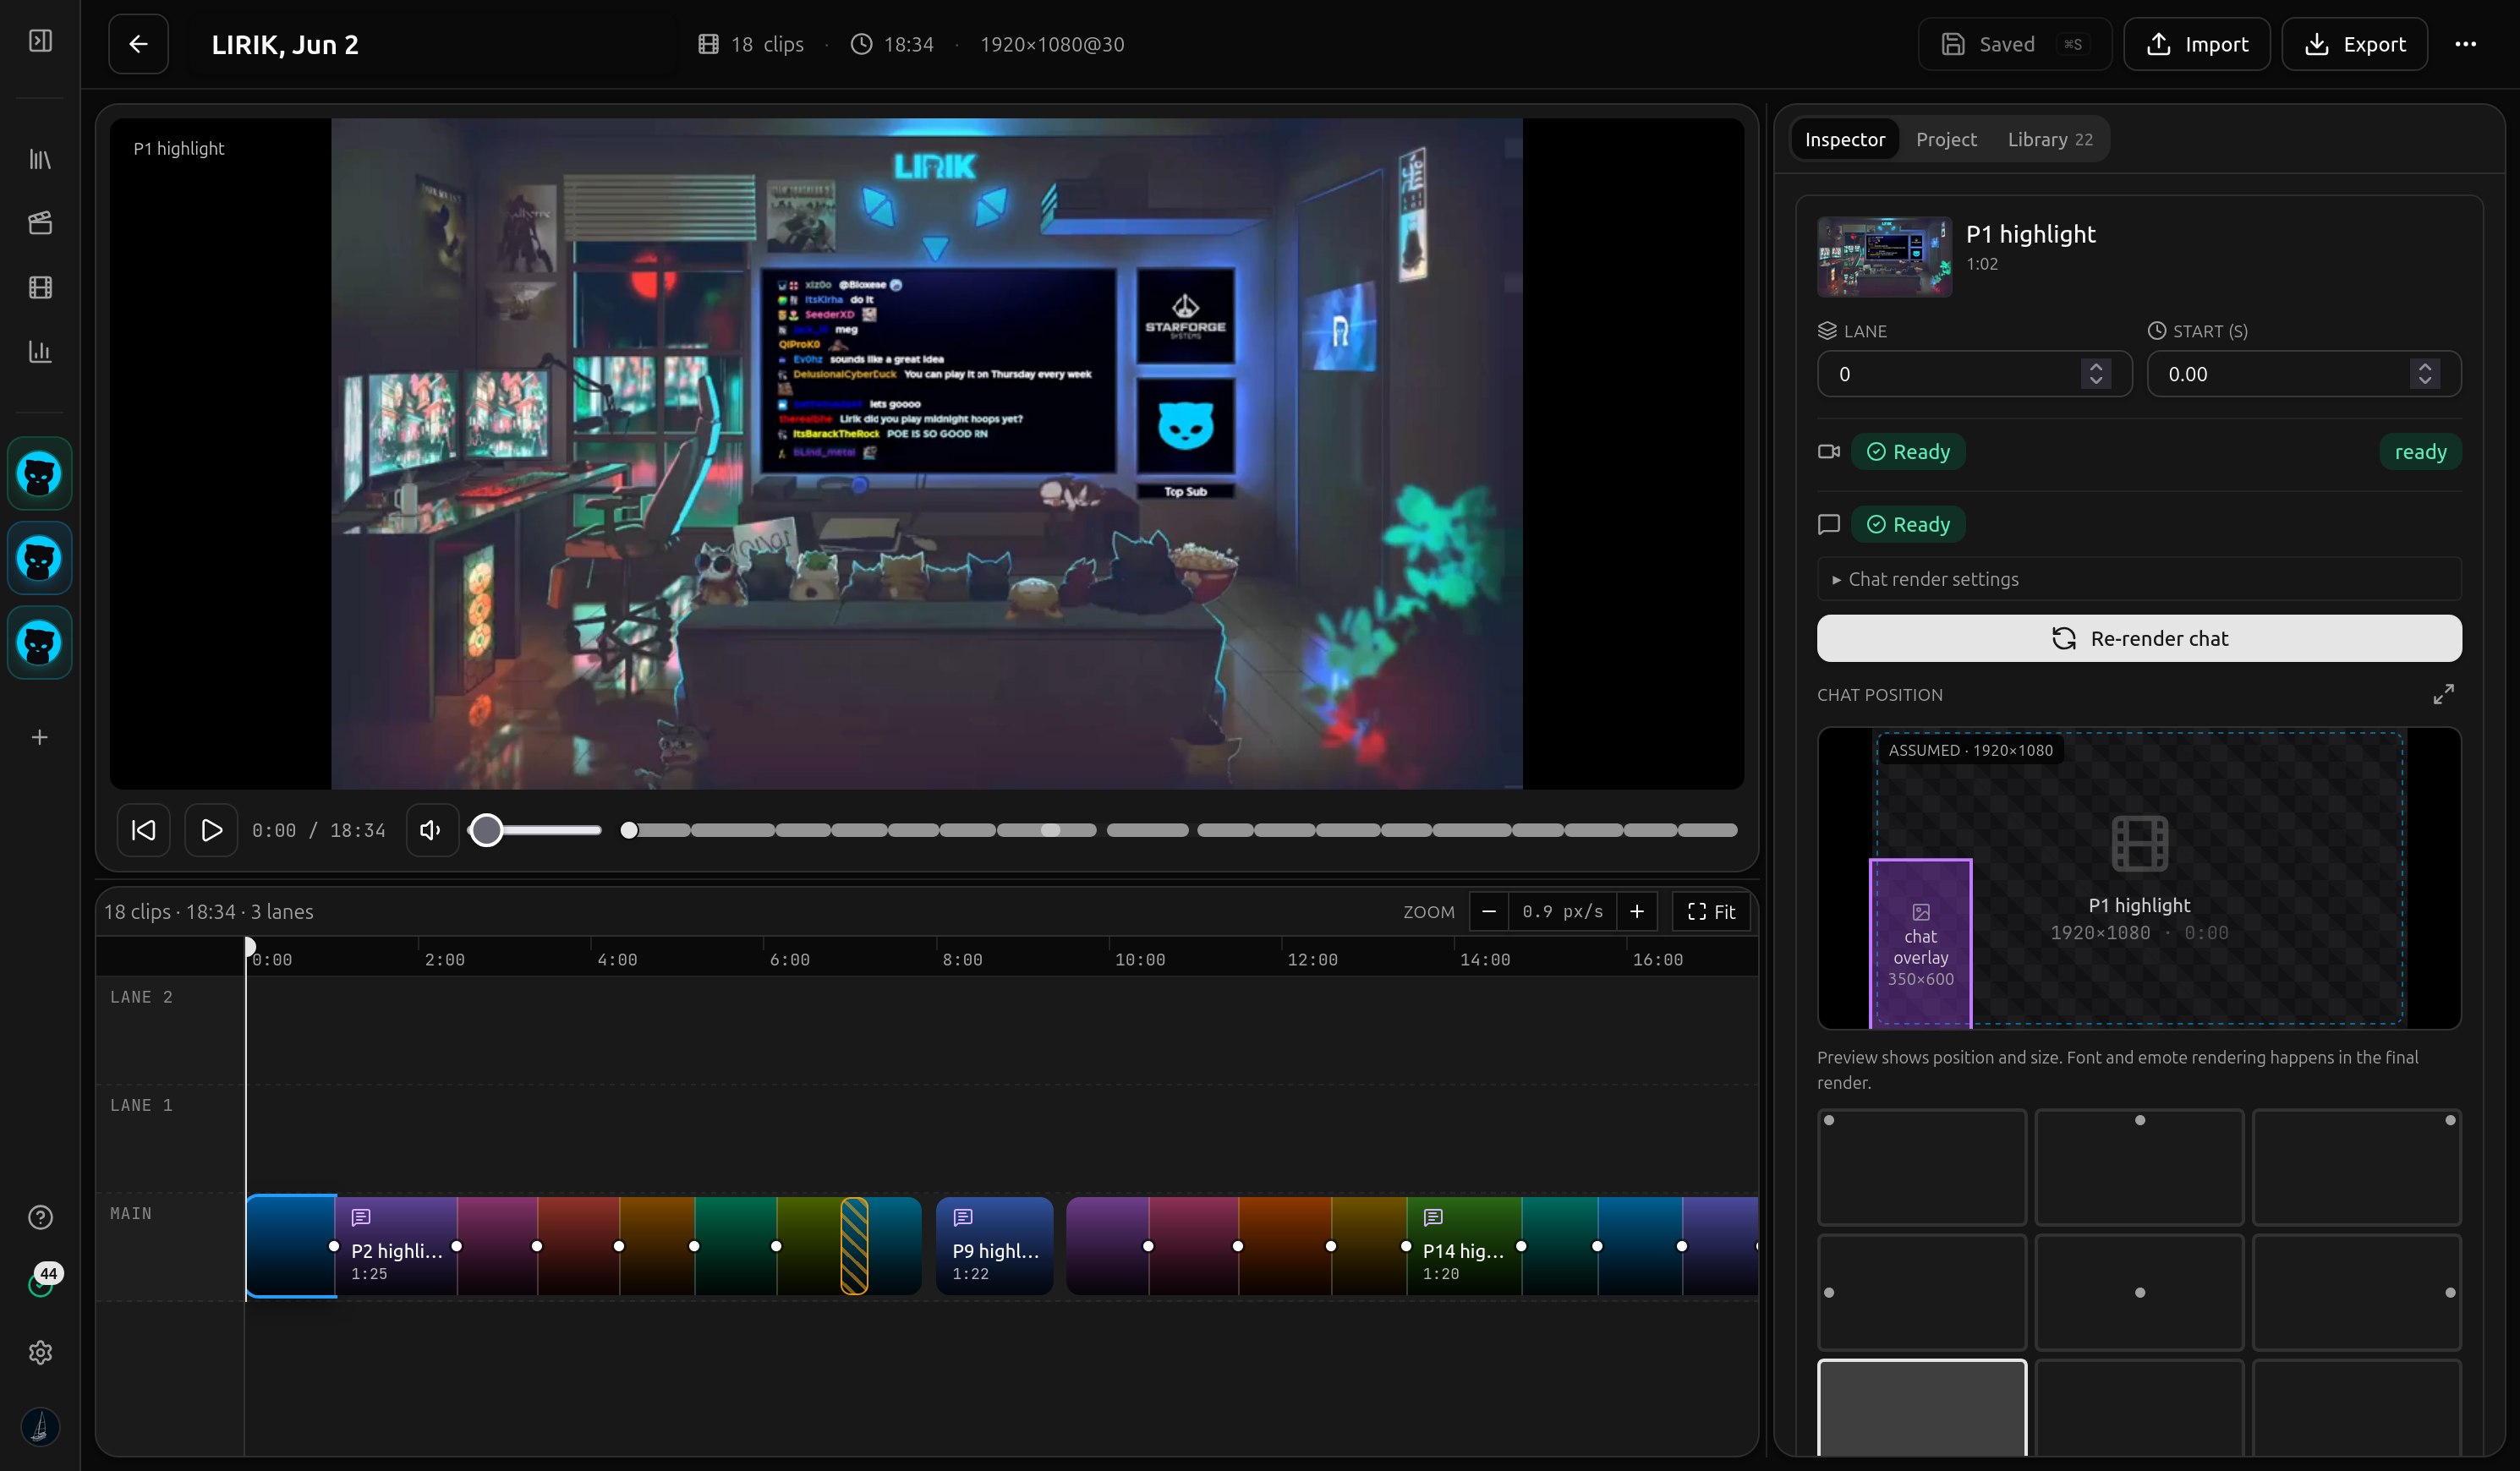
  1. The vod.ing clips manager showing a grid of clip cards with render states and thumbnails
  2. The vod.ing clips manager showing a grid of clip cards with render states and thumbnails
  3. The vod.ing clips manager showing a grid of clip cards with render states and thumbnails
The vod.ing timelines view showing timeline cards with clip counts, durations, and render progress
04 TIMELINE

Assemble a timeline

Drop your best clips onto a timeline, set resolution and frame rate, and arrange the cut without rendering anything locally.

  1. The vod.ing timelines view showing timeline cards with clip counts, durations, and render progress
  2. A vod.ing timeline with clips arranged in order, showing per-clip render progress
  3. The vod.ing timelines view showing timeline cards with clip counts, durations, and render progress
The vod.ing timelines view highlighting the export action for rendered clips and FCPXML
05 EXPORT

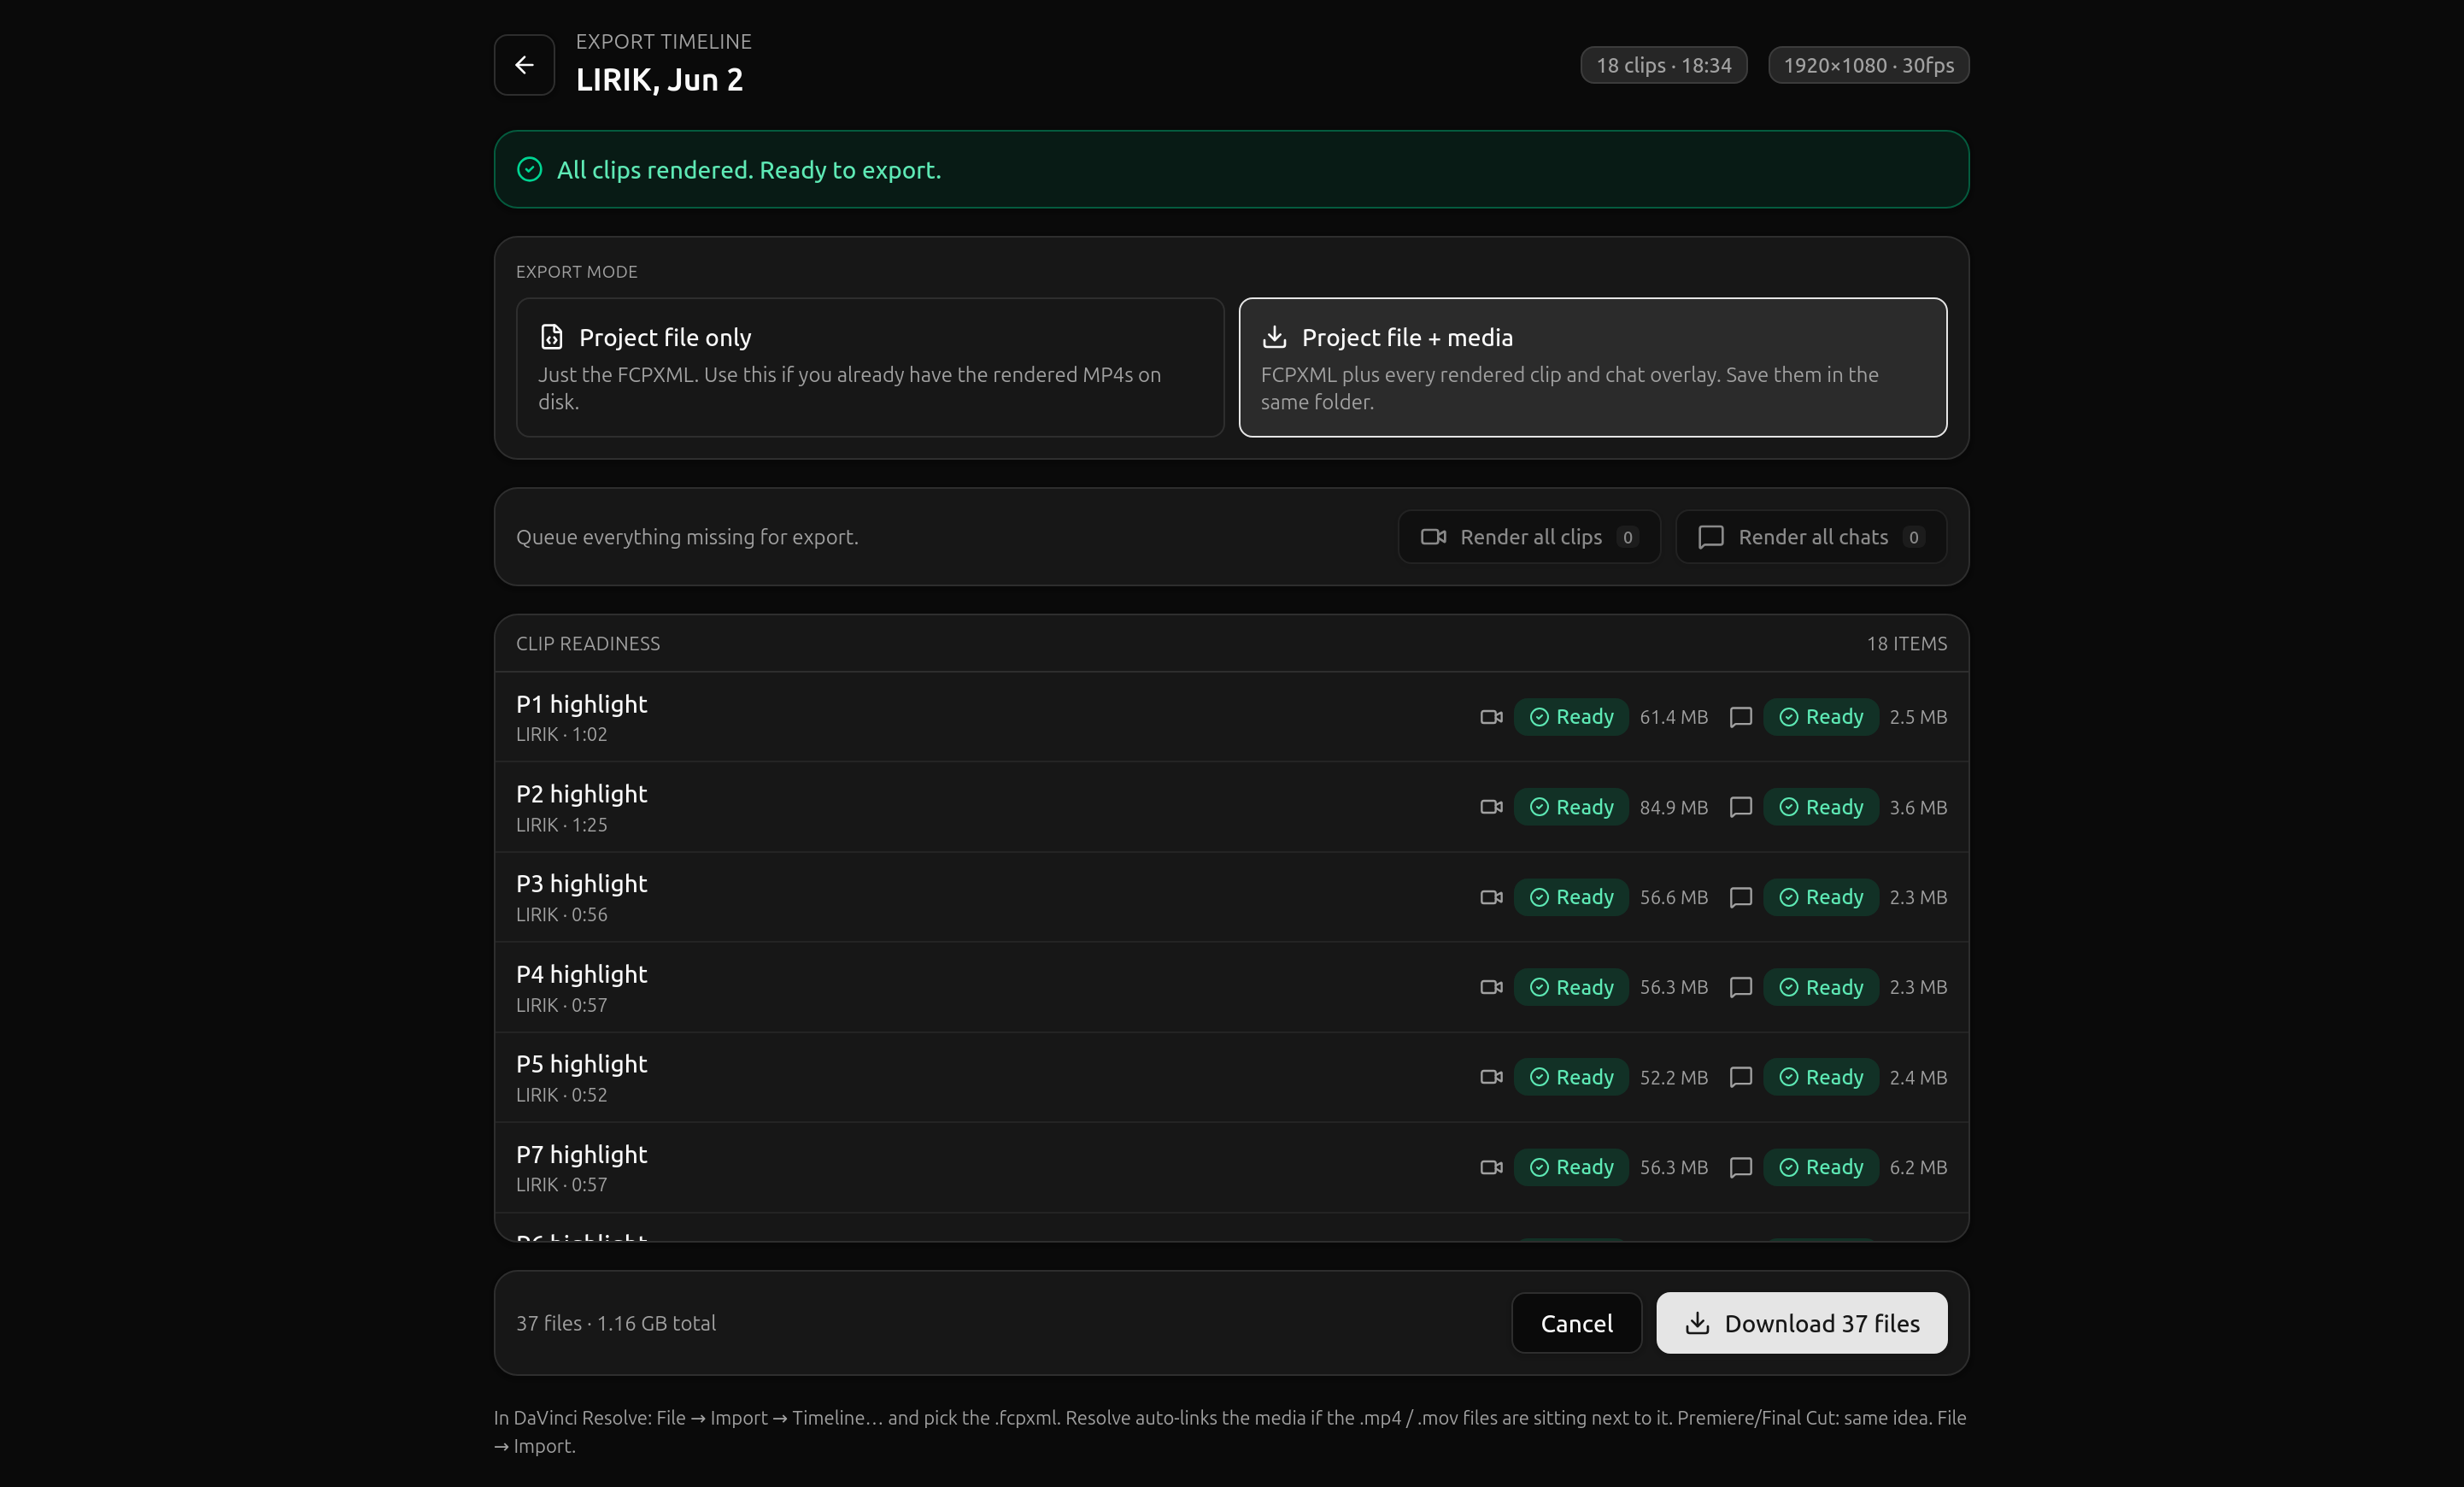
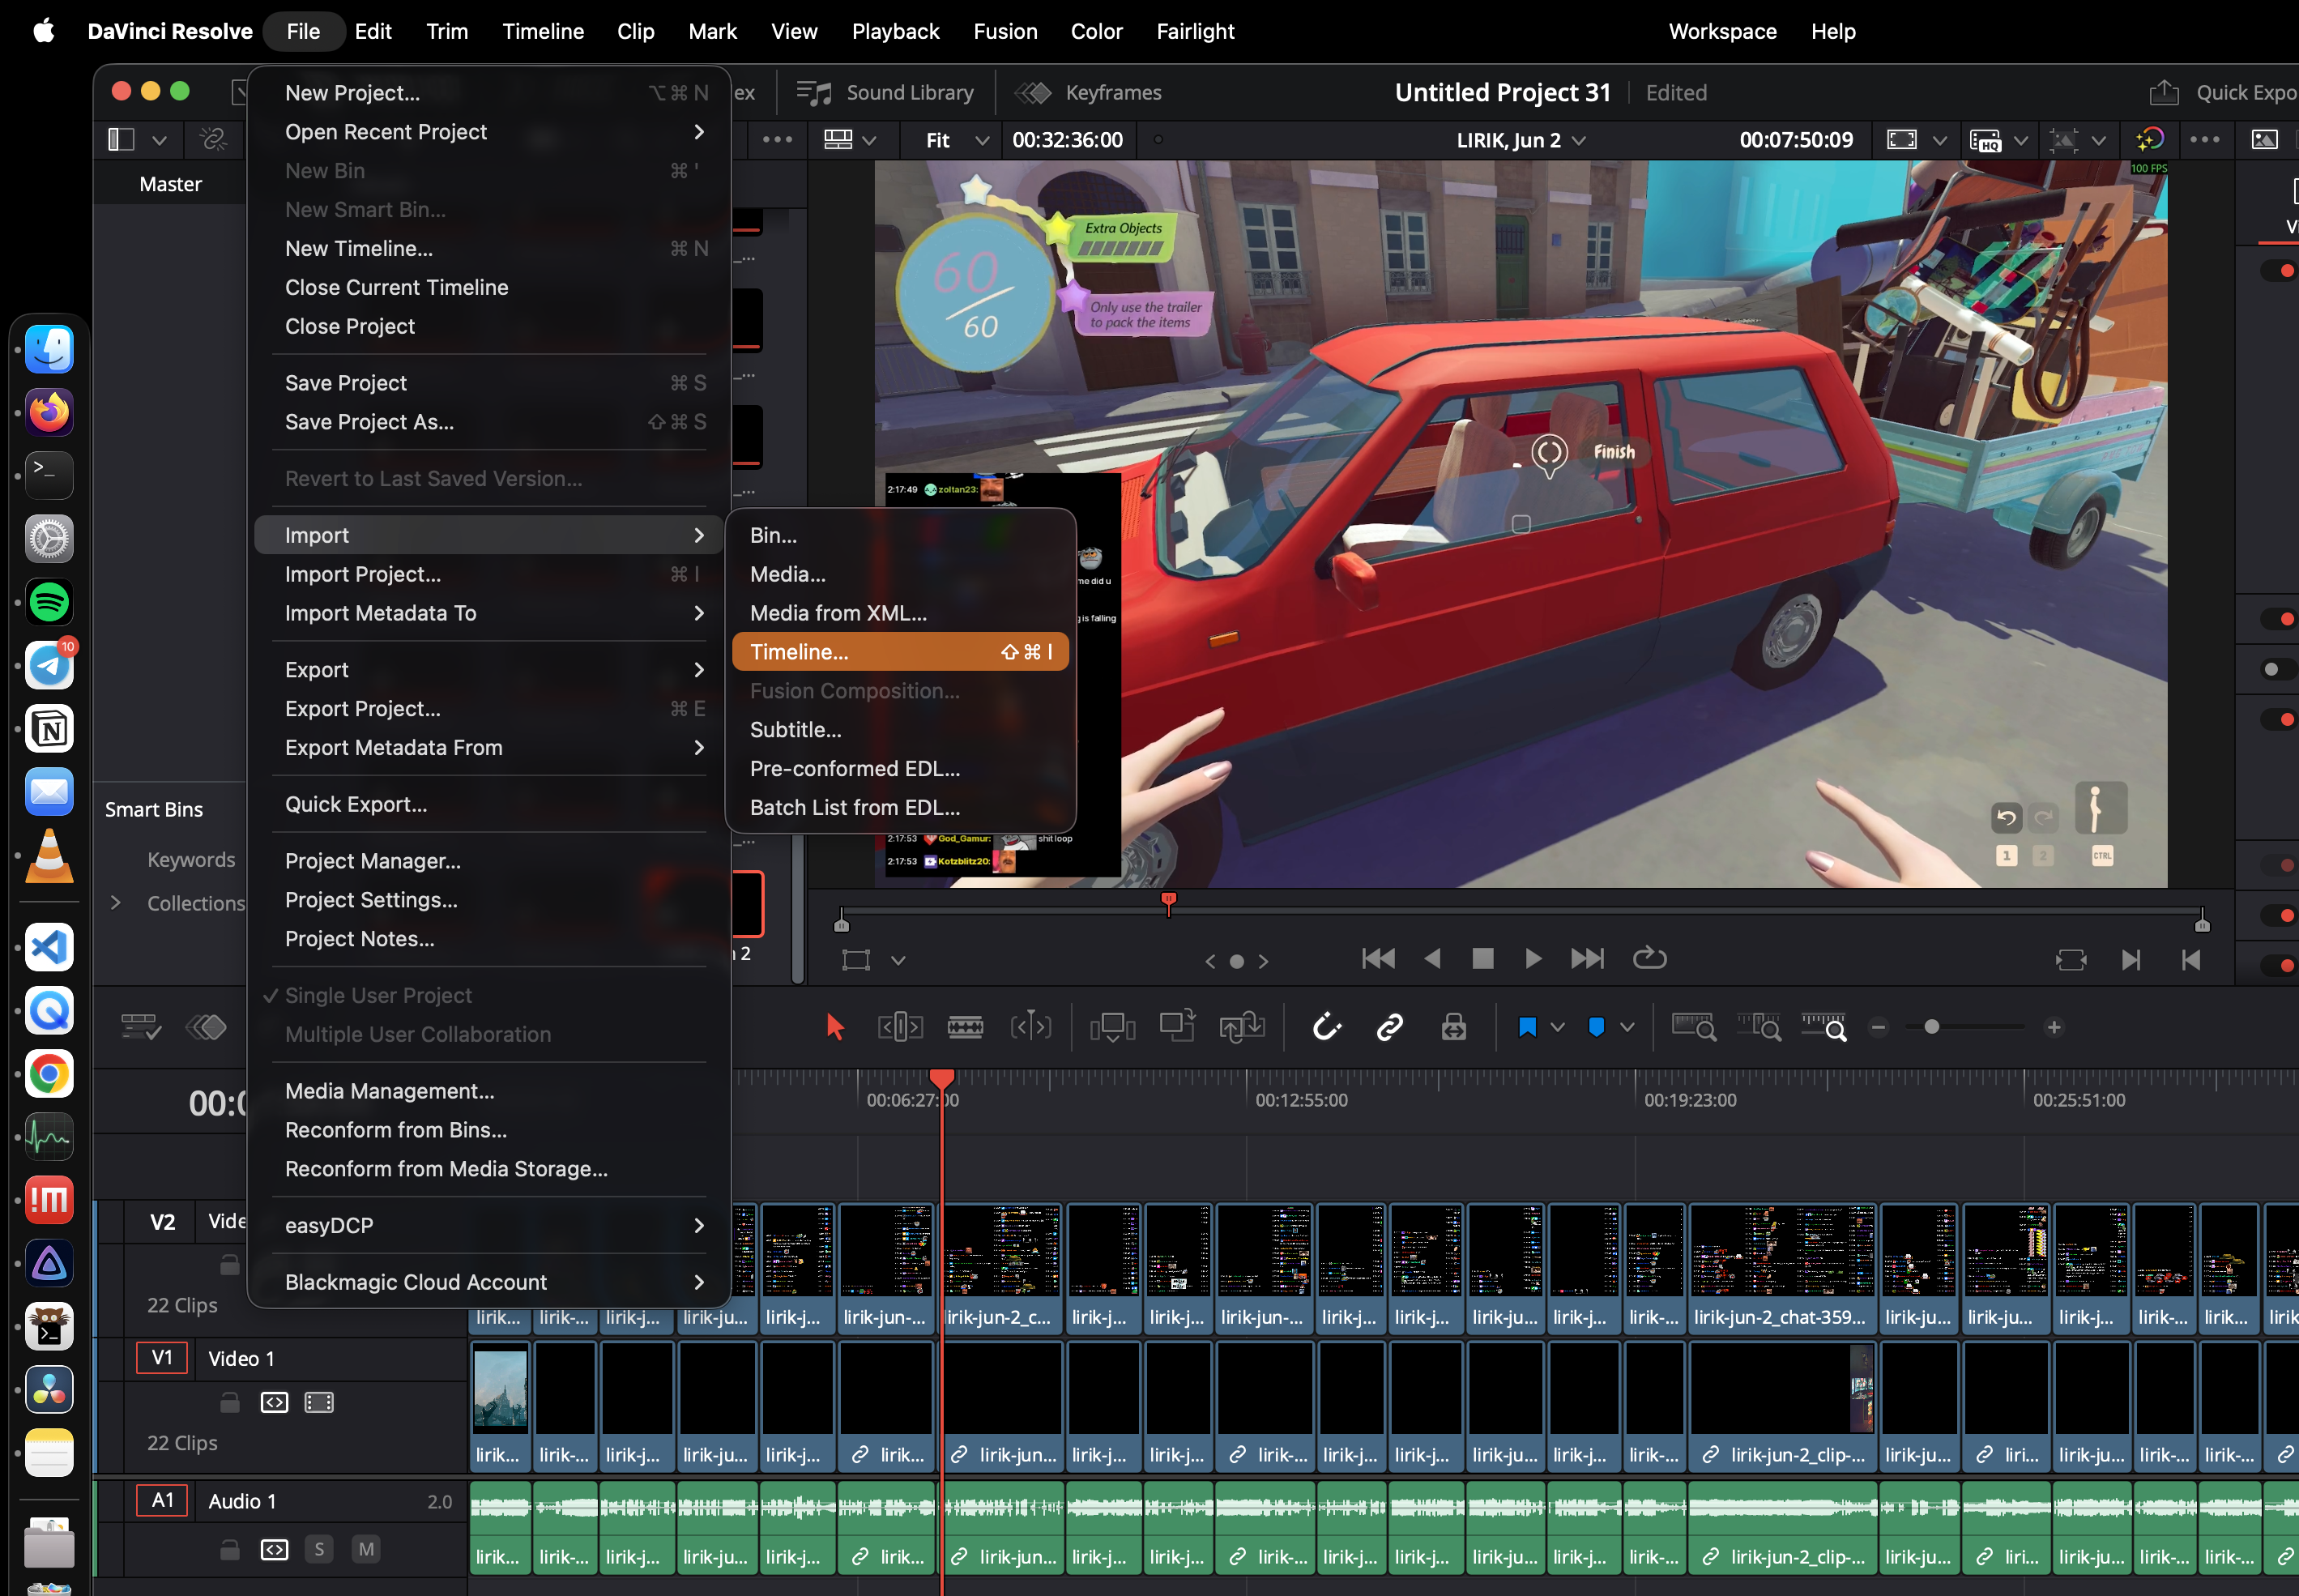
Export and drop into your editor

Download the rendered MP4s, or export an FCPXML timeline and import the whole cut straight into DaVinci Resolve or Premiere Pro.

  1. The vod.ing timelines view highlighting the export action for rendered clips and FCPXML
  2. The vod.ing timelines view highlighting the export action for rendered clips and FCPXML
  3. The vod.ing timelines view highlighting the export action for rendered clips and FCPXML

That's the whole workflow: long stream in, edit-ready clips out.

See pricing